Showing posts with label Scenery. Show all posts

Sunday, 27 January 2013

The Gallows!

Well I saw these on eBay and just had to have them!!


They're the Old West Hang Em High Gallows from Battle Flag and they really are a joy to own.


Now I have a usual rule about always building my own terrain but I was so excited about this kit I "forgot" about it.

It's one of these new wood kits with punch out parts and it was pretty easy to buildand super easy to paint. The hardest parta actually was the noose.

I ended up realising that the secret was to make a full scale noose then just keep tightening it until the hopp was the right size. Making one to scale immediately was too fiddly.


 Look! The trapdoor opens and it has a cute little lever and everything!


There's not much more to say. We can only bask in the coolness. 


I'm still basking. 


Yep. Basking away...

Friday, 30 November 2012

Scenery Workshop: Rocks!

So you want to build some rocky scenery?

Well now is your chance! Here's how!

1) Go to a hobby store and pay two to three times more than you're comfortable with for some sheets of foamboard.

2) Keep your clippers to hand in case of a cat attack.

3) Using a very sharp modelling knife, cut the foamboard into a pleasing shape, making sure the edges slope outwards.

4) In a crazed moment, decide to make six more similar pieces.


5) Buy a slab of insulation foam or sweet talk a builder to get some.

6) Assure the builder that it was purely about building some scenery. You don't want to start anything with him.

7) Cut a chunk of foam off the slab roughly the size of your first rock.

8) Try unsuccessfully to convince a family member it is a delicious piece of cheese.

9) Start to cut chunks out of the block to make it more naturally rocky-looking.

10) If your knife gets tired, lean it against the foam.


11) Cut up a whole load of rocks in the same way and glue them to your bases using wood glue.

12) Wait far longer than it says on the glue bottle for the glue to dry.

13) Rest knife.


14) In another mad moment, cut some of the rocks into preposterously unlikely shapes that would never really occur in nature.

15) Start to realise you've made too many scenery pieces. Question where the hell you're going to keep them all.

16) Reassure wife/girlfriend/builder that this scenery is vital to the continued existence of the universe.

17) Ensure tape measure is to hand but don't actually use it.


18) Get bored of making scenery.

19) Spend several weeks doing other projects.

20) Fend off complaints from wife/girlfriend/builder about the pointless waste of space your rocks are.

21) Agree to at least get them finished and play one game with them before you throw them in the trash.

22) Spray paint the rocks black.

23) Realise that spray paint doesn't work on foam.

24) Paint the rocks black using a brush.

25) Pause half way through to read about family fun at a messy church and to learn about the life of Muriel Spark.

(whoever she is)


26) Wet-brush the rocks brown.

27) Compare them to some rocks you made earlier.

28) Realise that rocks don't really come in such weird shapes.

29) Lay out some daemon models just in case.

30) Mix up a delicious looking beverage in your water pot.


31) Don't drink the beverage.

32) Paint round the bases and sprinkle bird grit on then paint over that.

33) Throw up if you did drink the beverage.

34) Wash out mouth.

35) Gargle.

36) Dry face and hands.

37) Finish painting rocks brown.


38) Use cream paint to slightly-less-wet-brush the rocks.

39) Realise that the old rocks look different from the new rocks.

40) Repaint the old rocks to match them up.

41) Lay the rocks out in a pleasing pattern.

42) Try to come up with some realistic-sounding (but still false) reasons why rocks would be sticking up in the air like that for when people ask.

43) Rest knife.

44) Go and watch TV with builder.


Monday, 19 November 2012

The Wailing Woods


Between the River Stacnek and Hangman's Road, on the edge of Bloodroot Forest north of Malko, is an eerie place tainted by the coming of chaos and the opening of the Pernicious Gate.

It is said that once the caress of chaos has been felt, the corruption of it will last forever more, and this taint spreads ever wide to north and south and east and west.


Here it sinks into the roots and the ground. It blackens the soil and twists the bark and branches of the trees into spectral shapes. Here the wind doesn't breeze and rustle through the leaves; it sounds in the hollows and crevices, wailing in bitter sorrow.

The wailing of the woods can be heard for miles in the small hours of night, keeping superstitious peasants awake and children crying in the village of Death Knell to the west. It is a godless sound that scratches scars on the soul that never heal. It is a sound to drive men mad.


Upon a time this land had been prime hunting ground for the lords of Malko where stags and pheasant could be shot or trapped. Now it is an empty lifeless warren of frightening dark and leery spectacle. It is a place of value to nothing or no-one except perhaps to the elves of Bloodroot Forest who care little for the taint of the Chaos Vein or to the Daemons who wish to pervert every corner of our bright realm.

To men it is a lost stretch of land, useful only as a place to take back from the brink of damnation; a place to purge with fire  and raze to ash; a place to stand and fight and say, "No more."


But even if this dreary location were ever purged so; burned and stripped to blackened stone, would it ever truly lose the taint of chaos? Or would the wailing continue across the scorched and barren earth?

Surely this place, like all places touched by chaos is damned forever.


In-Game Effects: 

Within the Wailing Woods, three dice are rolled for the Winds of Magic and the lowest one discarded. 

"Good" forces suffer -1 Leadership throughout the game unless they are Stubborn, cause Fear or are Immune to Psychology. 

Thursday, 1 November 2012

On the Painting Table: Rocky Scenery Pieces!

Why build one piece of rocky terrain...


... when you can have eleven!?


(Evil laughter)

Seriously, I woke up weekend before last and decided to go CRAZY with rocky scenery. 


My campaign map contains large areas that are mountainous which (books under my war blanket to make hills not withstanding) are quite hard to represent on my flat gaming table.

The idea here is that with almost a dozen rocky outcroppings of various sizes, I should be able to give a feeling of mountainous terrain on the relative flat. 


I've taken enough pictures of the process to justify a scenery tutorial post I'll release when I get round to it but basically: we're talking insulation foam on a foamboard base dry brushed brown and then cream. 


I had four pieces originally which I've touched up and fixed a bit but most of these are new pieces - all designed specifically for wargaming. In other words, with flat areas for sticking men. 


Having said that I was more about creating a suggestion of terrain than making them usable in that way. 


This piece, by the way, is the first ever scenery piece I made (fourteen years ago?). It is actually an enormous rock (and a few smaller ones), stuck on a cardboard base. Elegant but heavy. 


I'm running out of things to say about rocks now but still have several more pieces to show you. 


(Humming noise) 


(Drums fingers on table) 


(Sighs) 


Ah, that's a relief!

To say I am looking forward to using these in a game is understating things.

I actually really want to set them up in a wood. How cool would that be?!?

Friday, 19 October 2012

The Guillotine on Beggar's Mount

There is a place renowned in the Black Mountains for nothing but grisly obscene death.


There is tell that in times of old, the region there was rich in wealth, the mountains teeming with prospectors. Gold and jewels were to be found with little work and dwarfs and humans alike flocked to the area to increase their wealth.

The Border Princes has ever been a tough place to live or work and those days were no different. The prospectors had their share of predators, both beast and humanoid, but they defended their claims and formed a society of sorts, bartering and sharing, as little settlements sprung up in crevices all over the mountainous realm.

But in the centre of this nascent realm was a place called Beggar's Mount, a tall hill upon whose top was built a stage. On top of that was placed a deadly guillotine. No records tell of the builder of this dreadful device but tales speak of its need as thievery ran rampant because so much wealth was to be had.

The crime of theft was dealt with swiftly and finally by the hard line prospectors. They were there to grow rich. Any men who got in the way of that had to be dealt with.


The years went on and the number of executions increased. People say that the prospectors took a fondness for the sound of the sliding blade; the thunk of the decapitation. Whispers speak that not all the victims of the fiendish device were thieves. Not all were guilty of any crime.

It became merely sport as new arrivals to the area were weeded out so that the original prospectors could go on gathering more and more wealth.

And gather wealth they did until (as the rumours say), each prospector owned vast hordes of gold and jewel; wealth beyond counting. And still the guillotine on Beggar's Mount fell, cutting the necks of any who challenged their prosperity.


But it could not last forever.

Too much evil in one place can taint the land itself and the guillotine was the focus of decades of accumulated hedonism and murder. As time went on, the spirits of the unfair dead were said to howl round the mount when the moon was dim or when an execution was scheduled.

More than one passerby vanished in the night leaving no trace but their screaming lopped off head in the guillotine's catch-basket.

Stories of the horror surrounding this awful place grew more and more prevalent until it wasn't just fear of decapitation that kept away travellers and hopeful new prospectors. All those who heard of this dread region in the south east of the Border Princes knew that to visit there would assure death and eternal damnation.


Then finally, one cold winter night, every single inhabitant of the crooks and valleys for miles around was slain.

In one night, over two hundred prospectors and their families were dragged to the guillotine and decapitated.

Nobody knows who did it. No human being or dwarf remained alive at the end of that night within forty miles.

When travellers next passed through that region it had become a deathly silent place. Every cabin was deserted, every settlement falling into decay.

And at the guillotine on Beggar's Mount were piled the decapitated heads of every one of them.

People came in search of the treasure - despite their fear, of course they would. But none was ever found.

Every prospector had been murdered and every lump of gold; every diamond; had vanished.


Designer's Note: During games the guillotine of Beggar's Mount provides the following bonuses to units within 6": 

Undead Units: Gain an extra D3 wounds from spells which raise the dead. 
Other Evil forces: Gain Frenzy. 
Good and Neutral forces: Are subject to fear but also gain Stubborn. 

Thursday, 14 June 2012

Scenery Showcase - Forest River

The setup for my latest game...


  Deep in the Dark Heart.


  Icey water and glowering vegetation.


Saturday, 18 February 2012

Massacre on the Bridge of Hel Snatch

Orcs & Goblins (Tim) vs Warriors of Chaos (Mike) 

The forces of the Orcs were on the march, a cloud of smoke and vapour proceeding behind them as they charged down from their fortress of Gaping Maw.

The forces of Chaos had taken the mighty bridge of Hel Snatch over the river Trebleca, scant miles from the Orc fortress. If they didn't act now then their next visitors would be most unwelcome.


On the bridge, the forces of Dunkel Schloss waited, calling out jeers of challenge, carefully ranked up awaiting their enemies.


The Orcs formed themselves into two waves, a fast, hard hitting forward wave and a slower but denser follow up to mop up the survivors.


Little need be said of the battle that commenced. 

The first wave of the Orcs annihilated the War Wounds sent forward to meet them, overrunning into the waiting warriors beyond.


With so much destruction, the Warriors quivered momentarily in panic, but held firm, the will of chaos driving them on.

They were powerful warriors and battered down the opposition of the first wave. The sorcerer who led the Chaos force unleashed virulent plagues from his magics again and again, bringing down the Giants and chipping away at the onrushing Orcs and Goblins. He laughed maniacally as his power reached out, devastating all around him.


But would it be enough?


An Orc Warboss swept over the river onto the bridge from the bank, coasting over the streams of arrows and magical fire from the Arrer Boyz, and ripped into the Hellcannon and its crew. The monstrous war engine tore chunks from the wyvern's flanks but it wasn't sufficient to bring it down before the Hellcannon and its crew were ripped to shreds. The warboss fell but there was now a very angry wyvern amidst the ranks of Chaos.


The surviving warriors and knights charged but Bull Rogue, mighty troll leader of the Orc army swung his mighty axe, destroying them without resistance. He led the charge on the sorcerer and his guard and crushed him under the gargantuan blade. More and more warriors fell, and though they smote goblins by the dozen, it was a war of attrition and they simply did not have the numbers to sustain it.

It had seemed a close battle but it was over within minutes.

Bull Rogue and his Orcs had won. The mighty bridge of Hel Snatch was theirs once more and, for now, Gaping Jaw was safe.

Monday, 13 February 2012

How to Build a Bridge

With my push to make my campaign games more "realistic" in terms of the terrain that's fought over, I realised I needed a bridge.


But that was only the beginning of the thought process as the bridge size was going to be critical. Too narrow and it might look good, but the game played on it would be frustrating as units queued up to fight a one on one battle in the middle.

I decided to go for a bridge wide enough for three normal units (or a combination of larger and smaller units).

Here's how I went about it:

1) Decide that what you need is a preposterously over sized bridge.

2) Get some foam board from a hobby or art shop (Hobbeycraft sells this in England).

3) Gather a shockingly large amount of spare wood you happen to have lying around.


4) Use a craft knife to cut the foamboard into the appropriate sizes. My bridge is 17" wide. The level section is 22" long and the ramps are about 11.5".


5) Eat some Bran Flakes.

6) Glue on "hinges" made from cardboard. These allow the bridge to be set at different heights with the ramps then at varying pitch.

7) Write a note to yourself to not glue wood on later that will completely undermine the original plan to have bridge as adjustable (I missed this step).


8) Pile two paint pots up into an intriguing paint pot pyramid.


9) Reinforce the underside with hard balsa wood pieces while taking a refreshing drink of lemon.


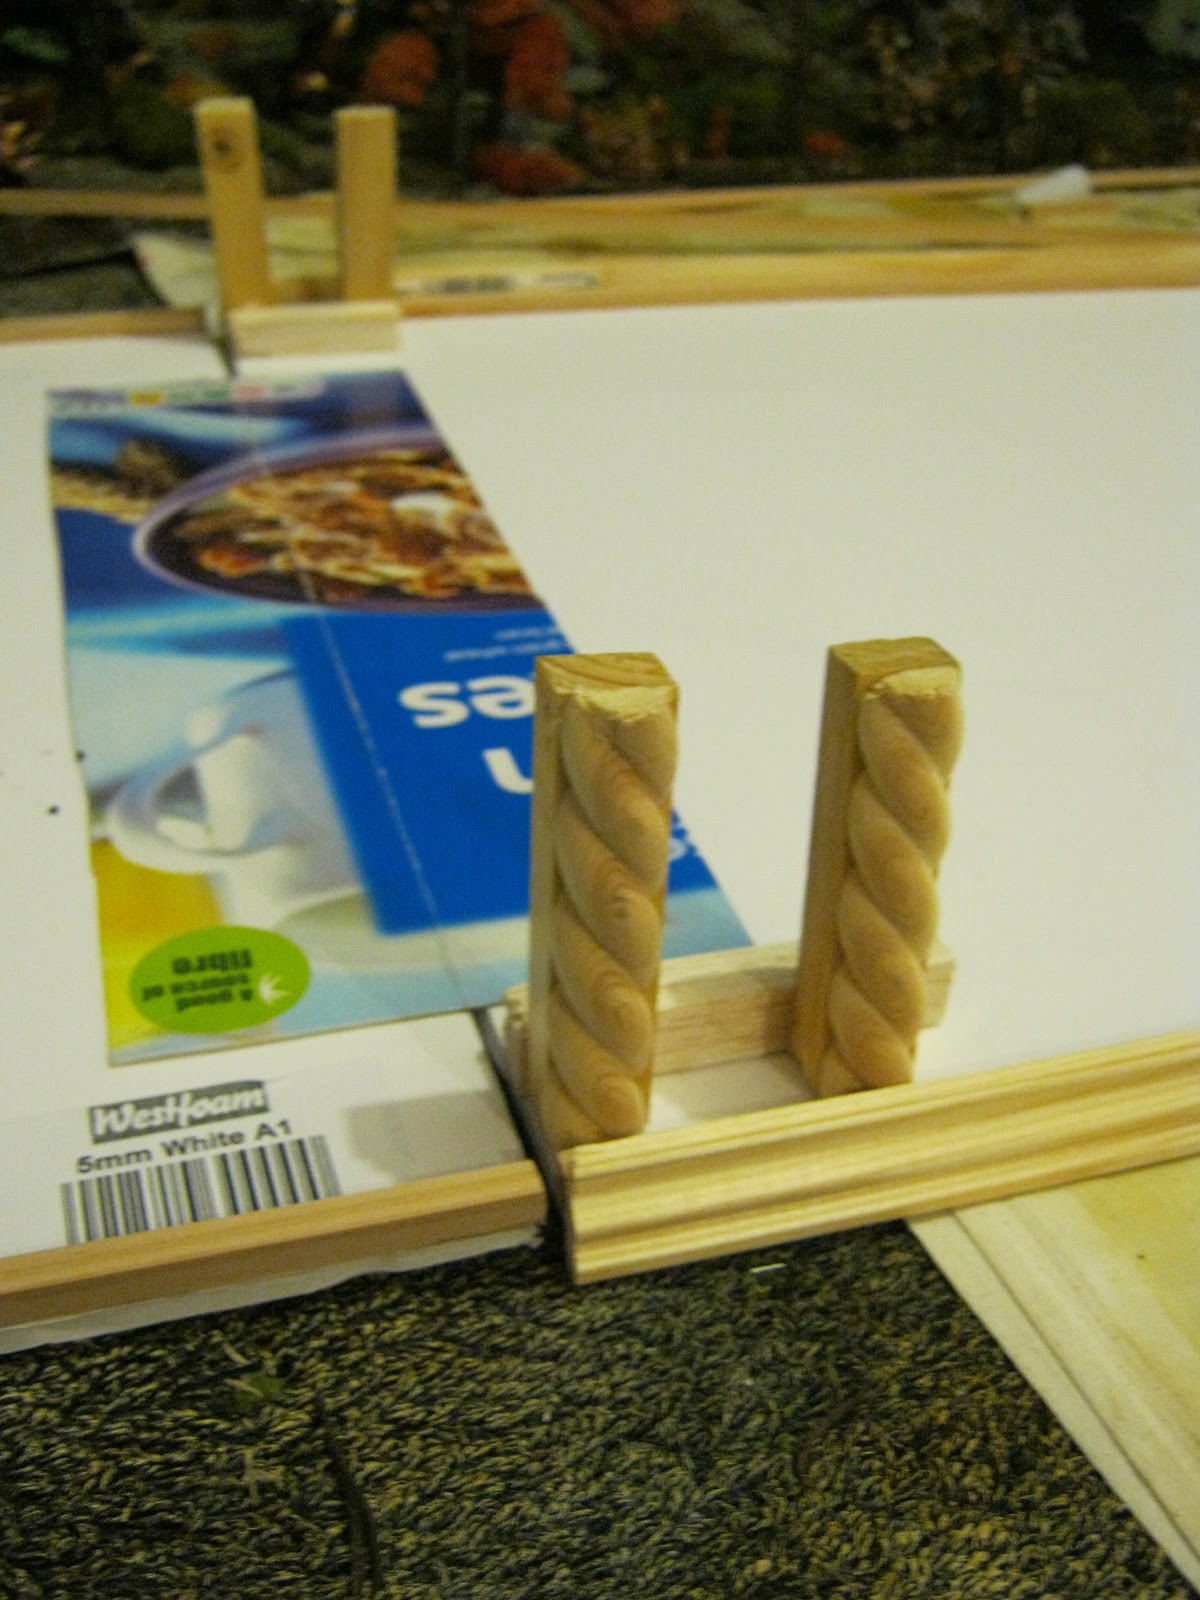
10) Cut some appropriately shaped moulding wood to and hang from the side of the bridge to give a decorative look and an illusion of thickness.

11) Use old VHS video tapes to hold the wood in place while it glues.


12) Add balsa wood on the edges of the upper side of the bridge to make an edge to it.

13) Remember to put that Homebase receipt someplace safe.


14) Make some legs from wood and decorate them with more moulding.


15) Realise the legs are too narrow and rip them off.

16) Take a photo and email to friends so they think you're a cool dude. Place miniatures and tower on bridge for scale demonstration. Ensure VHS tapes remain in shot for nostalgic purposes. 


17) Cut some new legs from insulation foam using a saw. Cut grooves in them to make them look like layered stone and paint them accordingly, dry brushing through various shades of grey.


18) Add more decorative moulding to the top of the bridge and use paper sheets to cover the cracks where the foam board joins are.


19) Paint the parts of the bridge that are going to be exposed black then dry brush through several shades of grey.

20) Try to ignore discarded fragments of broken legs.


21) Buy a black towel (or towelling material) of the appropriate size and dry brush Scorched Brown (I used a duplicated colour from B&Q). This is also how I did my war board blanket by the way. 


22) Drybrush the towel Bestial Brown in patches.


23) Take a bath. Use towel to dry yourself.

24) Place over a radiator.

25) When dry, drybrush the towel Bubonic Brown in overlapping patches so that all previous colours are still visible. 


26) Drybrush Bleached Bone in the same way. 


27) Put the towel on the bridge and set it up.


28) Realise it is preposterously big and you may have made a terrible mistake.

29) Console yourself with the fact that it is chuffing cool!